Ionic SocketIO Chat
In this tutorial, we’ll learn how to create a chat client that communicates with a Socket.IO Node.JS chat server, using Ionic!
| Android | iOS |
|---|---|
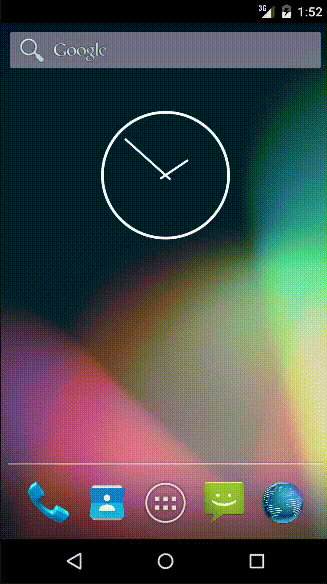 |
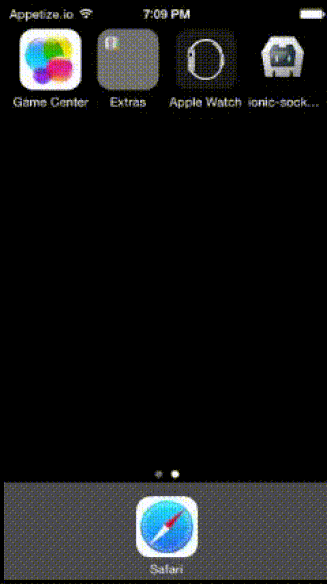 |
If you want to jump straight to the code, it’s on GitHub. Otherwise, read on!
##Introduction: To follow along, start by cloning the repository: socket.io-ionic-chat
The app has the following features:
- Sends a message to all users joining the room.
- Sends a notification when a user joins or leaves.
- Sends a notification when a user starts typing a message.
Before we explain how it is built, let’s get familiar with the technologies used:
-
Ionic: The beautiful, open source front-end SDK for developing hybrid mobile apps with HTML5. It offers a library of mobile-optimized HTML, CSS and JS components, gestures, and tools for building highly interactive apps.
-
Socket.IO: Socket.IO provides an event-oriented API that works across all networks, devices and browsers.
##Installing the Dependencies:
Install Ionic from this link.
npm install -g cordova ionic
or
bower install cordova ionic
Create a blank project.
ionic start chat-app blank
As Ionic apps are written in Angular, get the Angular Socket.IO library
bower install angular-socket-io
Create new folders and new files, so that the structure of the www directory matches the structure in the image below:

Basics:
The www folder in the chat-app directory contains a boilerplate to start coding. The index.html is the main file that bootstraps your entire application. Whenever you add a library, do not forget to add a link to this file. The app.js file is where you register different modules to create your main module.
Starting with app.js and index.html:
First, register the btford-socketio module in app.js.
var app=angular.module('ionic-socketio-chat-client', ['ionic','btford.socket-io'])
Add the newly added libraries to index.html before the link to app.js.
	<!--socket io client library-->
	<script src="http://chat.socket.io/socket.io/socket.io.js"></script>

	<!-- Other Libraries-->
	<script src="lib/angular-sanitize/angular-sanitize.min.js"></script>
	<script src="lib/angular-socket-io/socket.js"></script>
Add the controllers, services, and directive files you just created to index.html after the link to app.js.
	<!-- your controllers' js -->
	<script src="js/controllers/ChatController.js"></script>
	<script src="js/controllers/LoginController.js"></script>

	<!--your services' js -->
	<script src="js/services/socket.js"></script>

	<!--your directives' js -->
	<script src="js/directives.js"></script>
Also replace the body tag of index.html to reflect the module name in ng-app.
	<body ng-app="ionic-socketio-chat-client">
	    <ion-nav-view></ion-nav-view>
	</body>
Ionic framework uses ui-router library for routing between different states of your application. Configure your states in app.js.
For our app, we will define two states.
-
Login
with url “/login” and templateUrl “templates/login.html” -
Chat
With url “/chat/:nickname” where nickname is a parameter. and templateUrl as ‘templates/chat.html’
Each state has many parameters. We will be using the url and templateUrl parameter. To know more about the other parameters, please refer this link.
After the changes, your app.js file should look like this:
	// Ionic Socket IO app

	var app=angular.module('ionic-socketio-chat-client', ['ionic', 'ngSanitize','btford.socket-io'])

	.run(function($ionicPlatform) {
	  $ionicPlatform.ready(function() {
	    // Hide the accessory bar by default (remove this to show the accessory bar above the keyboard
	    // for form inputs)
	    if(window.cordova && window.cordova.plugins.Keyboard) {
	      cordova.plugins.Keyboard.hideKeyboardAccessoryBar(true);
	    }
	    if(window.StatusBar) {
	      StatusBar.styleDefault();
	    }
	  });
	})
	.config(function($stateProvider, $urlRouterProvider)
	{

	  $stateProvider
	  .state('chat', {
	    url: "/chat/:nickname",
	    templateUrl: "templates/chat.html"
	  })
	  .state('login', {
	    url: "/login",
	    templateUrl: "templates/login.html"
	  });

	  // if none of the above states are matched, use this as the fallback
	  $urlRouterProvider.otherwise('/login');
	})
##Write your login template:
	<ion-view ng-controller="LoginController as logcntrl" class="light">
	  <ion-content>
		  <div class="list list-inset light top180">
		  	<label class="item item-input linegrey" >
		    	<input type="text" class="linegrey white" placeholder="What is your nickname?" ng-model="logcntrl.nickname">
		  	</label>
		  	<button class="button button-block button-grey" ng-click="logcntrl.join()">Join</button>
		  </div>
	  </ion-content>
	</ion-view>
The ion view tag is container for view content and any navigational and header bar information.
The ion-content directive provides an easy to use content area that can be configured to use Ionic’s custom Scroll View or the built in overflow scrolling of the browser.
We will be using the Login Controller, which we will define in LoginController.js.
On Click of the button named JOIN, we call the function join defined in the controller.
##Write your login controller: In the Login Controller, we define a function named join.
We first sanitize the input entered by the user using Angular’s two-way binding. We will use Angular’s $sanitize for this.
After this, we change the state to chat using :
$state.go('chat',{nickname:nickname})
Your Controller should like this after the required changes:
	app.controller('LoginController',function($state,$sanitize) {
		var self=this;
		self.join=function()
		{
			//sanitize the nickname
			var nickname=$sanitize(self.nickname)
			if(nickname)
			{
				$state.go('chat',{nickname:nickname})
			}
		}
	});
##Integrating Ionic with SocketIO:
We can use the factory design pattern to create a service that will create a server and connect with the required host.
For this example, we will be connecting with http://chat.socket.io. The backend for this link is written using nodejs, and if you’re interested as to how it is, you can follow up at this link.
We will create a service named socket in the file socket.js in the services directory.
	app.factory('socket',function(socketFactory){
		//Create socket and connect to http://chat.socket.io
	 	var myIoSocket = io.connect('http://chat.socket.io');

	  	mySocket = socketFactory({
	    	ioSocket: myIoSocket
	  	});

		return mySocket;
	})
We inject socketFactory, which is an API for instantiating sockets that are integrated with Angular’s digest cycle. To learn more about the different parameters, check btford’s library.
##Writing the Chat Template: We will be using the ChatController for this template.
We check whether the the connected property is set to true. If it is, we will display the welcome message.
For all the other messages, we will be using the ng-repeat directive to iterate over the messages object.
At the bottom, we have a fixed message box. We use the ng-change directive to detect changes in the message. If the user inputs text or makes changes, the updateTyping() function is called.
	<ion-view view-title="Socket.IO Chat Demo" ng-controller="ChatController as chatCtrl" class="light-grey">
	 	<ion-nav-bar class="bar-dark">
	      <ion-nav-buttons side="right">
	        <button class="button button-clear icon ion-android-more-vertical right8" ng-click="chatCtrl.openPopover($event)">
	        </button>
	      </ion-nav-buttons>
	 	</ion-nav-bar>
	 	<ion-content has-bouncing="true" class="content">
		  <div ng-show="chatCtrl.connected">
		 	<div class="log pad2">"Welcome to Socket.IO Chat – ";</div>
		 	<div class="log"></div>
		  </div>
		  <div>
	        <ul>
	        	<li ng-class="{'message':message.style,'log':!message.style}"  ng-repeat="message in chatCtrl.messages" >
	        		<span ng-show="message.style" ng-style="{color:message.color}" > : </span >
	        	</li>
	        </ul>
		  </div>
		</ion-content>
		<div class="list light-grey bottommsg">
			<div class="item item-input-inset light-grey">
			  <label  class="item-input-wrapper line-light-grey nopadtop">
			    <input class="line-light-grey" ng-change="chatCtrl.updateTyping()" type="text"  placeholder="Message" ng-enter="chatCtrl.sendMessage()" ng-model="chatCtrl.message">
			  </label>
			  <div class="divsend">
				    <button class="button button-clear ion-android-send iconsend" ng-click="chatCtrl.sendMessage()"></button>
			  </div>
			</div>
		</div>
	 </ion-view>
We can add icons to buttons very easily in Ionic. The button next to the message box contains an ion icon.
We can also write a directive to call a function on enter rather than using ng-click. This improves the user experience. To add a directive, add the following to the directives.js
	app.directive('ngEnter', function() {
	        return function(scope, element, attrs) {
	            element.bind("keydown keypress", function(event) {
	                if(event.which === 13) {
	                        scope.$apply(function(){
	                                scope.$eval(attrs.ngEnter);
	                        }
	                        event.preventDefault();
	                }
	            });
	        };
	});
We call the sendMessage function defined in the Chat Controller on ng-click or the above directive.
##Adding Custom CSS: You can add custom CSS in the file added in index.html .
In our example, we added style.css which is in the www/css directory.
Please refer style.css for this project. This contains CSS for the Chat Tutorial.
For the messages to be displayed in different css we use ng-class.
In the tutorial, we use the log class to display the messages that are used when a user joins or leaves a group.
We use the message class if a user enters a message and also when the user receives a message.
If the CSS is redundant, please ignore it.
##Writing the Chat Controller:
We can use the socket service created above to perform chatting operations.
Inject this service in controllers and use socket as you will have in any other JavaScript projects.
	app.controller('ChatController',function(socket) {

	    socket.on('connect',function(){
	    //Add user called nickname
	    socket.emit('add user',’nickname’);
	    }
	}
##Emitting Events: The main idea behind Socket.IO is that you can send and receive any events you want, with any data you want. Any objects that can be encoded as JSON will do, and binary data is supported, too.
For example, let’s emit a message to all the users at http://chat.socket.io.
socket.emit('new message',”Hi Socket IO is awesome”)
##Listening to Events: Socket.IO is bidirectional, which means we can send events to the server, and the server can also send events to us at any time during the communication.
These events will be sent by the server with which you are communicating. As we have connected to the http://chat.socket.io/, we will be receiving events defined in the server side node script.
For example, let’s listen to a new event called ‘new message’ . This event will be sent by the host to which you are connected.
	socket.on('new message', function (data) {
	    addMessageToList(data.username,true,data.message)
	});
When the user hits send message, we first emit an event with a ‘new message’ and then add the message to our list of messages (i.e., display on the client screen).
	//function called when user hits the send button
	self.sendMessage=function(){
	  	socket.emit('new message', self.message)
	  	addMessageToList($stateParams.nickname,true,self.message)
	  	socket.emit('stop typing');
	  	self.message = ""
	}


	function addMessageToList(username,style_type,message){
	  username = $sanitize(username) //The input is sanitized For more info read this link
	  var color = style_type ? getUsernameColor(username) : null //Get color for user
	  self.messages.push({content:$sanitize(message),style:style_type,username:username,color:color})  // Push the messages to the messages list.
	    $ionicScrollDelegate.scrollBottom(); // Scroll to bottom to read the latest
	}
This is what the function addMessageToList looks like. You can customize it as you want.
We will add content, style , username and color to the message list, which will be displayed using ng-repeat directive.
To set the message style class, we send true for message and false for log messages.
We use $ionicScrollDelegate to scroll to the bottom, so that the user reads the latest message.
For user joined and user left, we define two functions:
Similarly, we listen to the ‘user joined’ and ‘user left’ event.
	// Whenever the server emits 'user joined', log it in the chat body
	  socket.on('user joined', function (data) {
	  	addMessageToList("",false,data.username + " joined")
	  	addMessageToList("",false,message_string(data.numUsers))
	  });

	  // Whenever the server emits 'user left', log it in the chat body
	  socket.on('user left', function (data) {
	    addMessageToList("",false,data.username+" left")
	    addMessageToList("",false,message_string(data.numUsers))
	  });

	// Return message string depending on the number of users
	  function message_string(number_of_users)
	  {
	  	return number_of_users === 1 ? "there's 1 participant":"there are " + number_of_users + " participants"
	  }
For user typing messages:
We listen to ‘typing’ and ‘stop typing’ events to perform the action. This is again done using socket.on(event name).
	//Whenever the server emits 'typing', show the typing message
	  socket.on('typing', function (data) {
	    addChatTyping(data);
	  });

	  // Whenever the server emits 'stop typing', kill the typing message
	  socket.on('stop typing', function (data) {
	    removeChatTyping(data.username);
	  });

	// Adds the visual chat typing message
	function addChatTyping (data) {
	    addMessageToList(data.username,true," is typing");
	}

	// Removes the visual chat typing message
	function removeChatTyping (username) {
	  	self.messages = self.messages.filter(function(element){return element.username != username || element.content != " is typing"})
	}
These functions are fairly straightforward.
In the removeChat typing function, we use a javascript filter to filter out messages from the messages list to remove the is typing message.
We also need to emit a ‘typing’ event to the server when the user is typing.
	// Updates the typing event
	  function sendUpdateTyping(){
	  	if(connected){
	  		if (!typing) {
		        typing = true;
		        socket.emit('typing');
		    }
	  	}
	  	lastTypingTime = (new Date()).getTime();
	  	$timeout(function () {
	        var typingTimer = (new Date()).getTime();
	        var timeDiff = typingTimer - lastTypingTime;
	        if (timeDiff >= TYPING_TIMER_LENGTH && typing) {
	          socket.emit('stop typing');
	          typing = false;
	        }
	      	}, TYPING_TIMER_LENGTH)
	  }
We use the ng-change directive defined in the chat.html template. On every input changed, the above function is called. We set a timeout so that we can remove the typing message when the user stops typing. To get the entire ChatController.js, please refer the link on github.
##Final Build: After you have done everything as mentioned, you can build the project.
For Android check, the setup on this link.
For iOS, check the setup on this link.
cd into your main project folder.
cd chat-app
Add platform :
ionic platform add android or ionic platform add ios
Run ionic build:
ionic run android or ionic run ios
##Further Readings:
You can create your own server to interact with this app.
You can also add chat rooms.
To learn more about it check the socketio rooms and namespace feature.